Blue and Yellow Kitchen

Wednesday, June 15, 2005

Lemon Chicken


Got this recipe from Dorothy Ferreria's cookbook, volume 2. I saw a new cookbook in National Bookstore, by Dorothy Ferreria, but was disappointed that it's just a new release of her old cookbook recipes. I love the recipes from her cookbooks. I feel that they're well suited to the Pinoy tastebuds. I have tried many of her recipes, and not once have I encountered a palpak one.

I love lemon chicken. It's almost always the first dish I look for in Chinese restaurants, next to prawn salads. :0 For me, a lemon chicken dish is similar to a sweet and sour pork dish, although less common. Both have that sweet and sour taste that I like so much, and both go so well with Yang Chow fried rice. Mmmm... yum.

This lemon chicken recipe is not the typical lemon chicken dish you would expect to find in Chinese restaurants, where the sauces are bright yellow. Maybe the addition of soy sauce gave this dish's sauce a slightly dark yellow color. I prefer my sauce to be a bit on the sour side, so I added more pineapple juice until I was satisfied with it.

Ingredients:

1 kilo chicken breasts or thighs, skinned, deboned and cut into chunks.
1/2 c rock salt
oil for frying

Batter
1/2 c cornstarch
2 c sifted all-purpose flour
1 whole egg
2 cups water

Sauce
1/3 c granulated white sugar
1 1/2 t fine salt
1/4 c unsweetened pineapple uuice
2 T cornstarch
1 c water
1 t soy sauce
1 American lemon, washed and sliced thinly into rounds

Procedure:
1. Rub the chicken with salt, rinse and pat dry. Set aside. Heat about a cup of oil in a large frying pan. While waiting for the oil to heat up, prepare the batter.

2. To prepare the batter, combine the cornstarch, the flour, the egg and the water in a bowl. Mix with a wire whisk until smooth. Dip the chicken in the batter and fry over medium heat until golden brown. Drain on paper towels to blot out excess oil. Arrange the chicken pieces in a serving platter. Set aside.

3. For the sauce, combine the first 6 ingredients in a saucepan. Cook over medium heat until slightly thick. Remove from heat and quickly stir in the lemon slices.

Dorothy suggests serving the sauce separately to preserve the crispiness of the chicken. But I poured the sauce on top of the chicken immediately before serving.
Sunday, June 05, 2005

Green Tea Cheesecake

Image hosted by Photobucket.com
Liza has turned me into a green tea fanatic.

I have been obsessed with this flavor ever since. When we went to China, I would "oooh" and "aaaaah" over the green tea pastries and drinks they had. In fact, I bought green tea milk tea, green tea walnut biscuits, green tea mini snacks (like buchi but different texture). And if Starbucks' green tea frapuccino wasn't so darn expensive, not to mention fattening, I would probably be drinking it everyday.

So I was so happy to find this recipe in Food Magazine's April 2005 issue. It's by Dorothy Ferreria, one of my favorite chefs. It's a no-bake cheesecake, so it's an easy recipe. My comments are in red. :)
Ingredients:

For the crust:
6 T butter
3/4 C crushed chocolate-flavored graham biscuits

For the cheesecake:
1 1/2 t green tea powder
3/4 c water, divided
2 T unflavored gelatin
1 225 gram cream cheese
3 c all purpose cream
1/2 c white sugar
green food color (optional)

For the topping:
1/2 c all purpose cream, well chilled
2 T powdered sugar
bittersweet chocolate curls or shavings

Make the crust: Line the bottom of eight 3-inch stainless /PVC rings with foil. Line the sides with acetate film. Arrange prepared molders in a tray. Set aside.
I used only five 3-inch removable bottom pans. And with the crust recipe, I felt that the crust was too "wet." So I added around 4 tablespoons more. You can add in more (or less) if you want. Just make sure that the crust is still wet enough to hold together.

Melt butter in a heavy saucepan. Add crushed biscuits and blend well. Divide the mixture equally among the prepared molders. With back of a teaspoon, press the crust against the foil lining to form a solid crust for the bottom. Set aside.

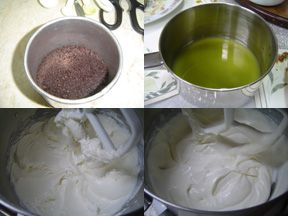
Make the cheesecake: In a small saucepan, disperse green tea powder in water. Mix well and place over low heat until the powder blends with the water. Measure 1/2 c of the mixture and transfer to another saucepan. Stir in gelatin and allow granules to swell.
I couldn't taste the green tea flavor for the first batch I made, so I added more until I completely ruined the cheesecake mixture. For my 2nd batch, I used 1 1/2 tablespoons green tea powder and even steeped some green tea leaves in the green tea powder-water mixture. Still, the green tea taste wouldn't come out. I'm not sure if it was because the powder I used was a green tea powder with sugar type. I would suggest you use something stronger when you're making this.

Cook gelatin-green tea mixture over low heat until the gelatin dissolves completely, taking care that the mixture does not boil. Set aside.

With an electric mixer, beat the cream cheese until fluffy. Pour in all-purpose cream and the sugar. Beat until smooth. Pour in the gelatin solution and continue to beat until blended. Enhance with green food color if desired.

Divide the mixture equally among the prepared molders. Freeze or chill until firm. When ready to serve, unmold the cheesecakes to a platter and top with whipped cream and chocolate shavings.

Make the topping: Beat all purpose cream and sugar until it somewhat doubles in volume. Transfer the mixture to a pastry bag fitted with an open star tip. Use to pipe topping on the cheesecake.

This is a good basic cheesecake recipe, and it's very simple to make. If you really want the green tea flavor to come out, use a stronger green tea.

Thursday, June 02, 2005

Peaches and Cream Torte


This is a recipe I got from Dorothy Ferreria's first cookbook. It is the cake I make when I'm craving for something light, fruity and refreshing. The house is filled with the scent or fresh oranges after I take the cake out of the oven. I only wish I had doubled the recipe for the frosting, since I wanted more fillings between the cake layers. The cream cheese in the frosting adds zing to the cake. The slightly salty but creamy flavor of the cream cheese goes so well with the orange cake layers. I think you can also substitute mangoes for the peaches. I haven't tried it yet, but will post it when I do.

Ingredients:

Orange chiffon cake:

1 cup plus 2 T sifted cake flour
1/2 c granulated white sugar for egg yolks
1 1/2 t sifted baking powder
1/4 c corn oil
3 egg yolks
1/2 t pure orange extract
1/3 c water
1/2 t fine salt
1/2 c egg whites
1/4 t cream of tartar
1/4 c granulated white sugar for egg whites

Frosting:
1/2 of a 225 gram bar cream cheese
1 cup whipping cream
1/3 c sifted powdered sugar
1/2 of an 822 gram-can sliced peaches in heavy syrup

Garnishing:
finely chopped walnuts
white chocolate leaves

1. Preheat the oven to 350 degrees Fahrenheit. Line the bottom of an 8 inch round cake pan, 3 inches high, with wax paper. Set aside.

2. In a bowl, combine the cake flour, sugar, baking powder, corn oil, egg yolks, flavoring, water and salt. Beat with a wire whisk until smooth.

3. In another mixing bowl, pour in the egg whites and the cream of tartar. Beat with an electric mixer until frothy. Gradually add the remaining sugar while continuing to beat at medium speed. After adding all of the sugar, increase the speed of the mixer to the highest speed and continue to beat the egg whites until they are stiff but not dry.

4. Carefully fold the egg yolk mixture into the beaten egg whites. Pour the batter onto the prepared baking pan and bake for at least 30 minutes or until a toothpick inserted in the center of the cake comes out clean.

5. Allow the cake to cool for 15 minutes in a wire rack in an upside down position. Unmold the cake from the pan and position it right side up n a cooling rack to cool completely.

6. To prepare the frosting, in a large mixing bowl, using an electric mixer, beat the cream cheese until light and fluffy. So as not to overwork you mixer, make sure that the cream cheese is at room temperature before beating. Add the cream and the sugar and increase the speed of the mixer. Beat until it thickens and doubles in volume. (I learned from school that paddles are used for beating cream cheese and butter, while whisks are for eggs and cream. In this case, I switched from paddle to whisk before whipping the cream.)

7. Divide the cake horizontally into 3 or 4 equal layers, depending on how skilled you are with a finely serrated cake knife. Slice the peaches as thinly as possible. Spread some prepared frosting over the first layer of the cake. Top with sliced peaches. Place the second layer of cake over the first layer and again spread some prepared frosting and top with peaches. Continue in the same manner until all cake layers have been utilized.

8. Completely cover the top and sides of the cake with the remaining frosting. Garnish the top surface of the cake with more peaches. Garnish the sides with finely chopped walnuts and white choclate leaves. Pipe out some frosting in the lower edge of the iced cake, if desired, for a dressed up look.

9. To prepare the white chocolate leaves, melt about 100 grams of white chocolate over low heat in a thick saucepan. Using a butter knife or metal spatula, spread some melted chocolate in the underside of washed and dried leaves such as rose, alugbati and dayap. Arrange the leaves in a plate and freeze briefly to set. Apply another coat of melted chocolate and freeze until the chocolates lose their sheen. Carefully peel off the real leaf from the chocolate leaf and use immediately for garnishing.

**SM's home department sells this gadget which helps me divide my cakes into horizontal layers beautifully. They come cheap (at less than P300 I think.

Happy eating!!

Wednesday, June 01, 2005

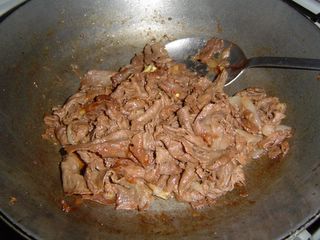
Beef stir-fry

 Posted by Hello


I was in the mood to cook last Sunday. I had grand thoughts of preparing a caldereta dish, the recipe of which I got from one magazine. Or tinolang manok. Or giniling with tofu. But I checked our freezer and we had no chicken or beef (for caldereta) left. We had a lot of sukiyaki cut beef though -- around 4 trays of them. Since I just wanted to cook that day, I just used whatever ingredients were available already. Plus, I needed to cook it quickly, since it was already quarter to 12pm by then. I originally wanted to use oyster sauce, but I felt that using char siu sauce would give the dish a different taste. Char siu sauce is the sauce used for the asado in Chinese restaurants. It's sweet and salty at the same time. I wanted to add in honey to the dish, but we didn't have any in our cupboard. You can add honey to this dish, which I think would go well with the char siu sauce.

This is a very easy to cook recipe, which needs minimum preparations. It can be topped on rice for dinner, or sandwiched between two wholewheat bread for lunch baon.

Ingredients:

1/2 onion, sliced into rings
1/4 kilo beef, sukiyaki cut
3-4 T Lee Kum Kee char siu sauce (adjust depending on your taste)
dash of chili pepper flakes
salt and pepper to taste

1. Heat oil and saute onions until onions are translucent.

2. Add in beef and stir fry only until beef changes color.

3. Add in char siu sauce, chili pepper flakes, salt and pepper.

See, it's that easy. :)